
There’s something extra special about baking together, especially around the holidays. This year, my daughter and I made snowman cake pops for her Christmas dinner at school, and it turned into one of those fun moments I know we’ll both remember. Sticky fingers, lots of giggles, and of course a little taste-testing along the way, especially her, she kept on stealing the dough while I looked away 😀

These snowman cake pops are actually an old favorite in our house. I first made them a few years ago for her Pokémon-themed 5th birthday party (yes, even Pikachu-approved!). Ever since then, they’ve become my go-to treat whenever I need something fun, festive, and guaranteed to make kids happy.
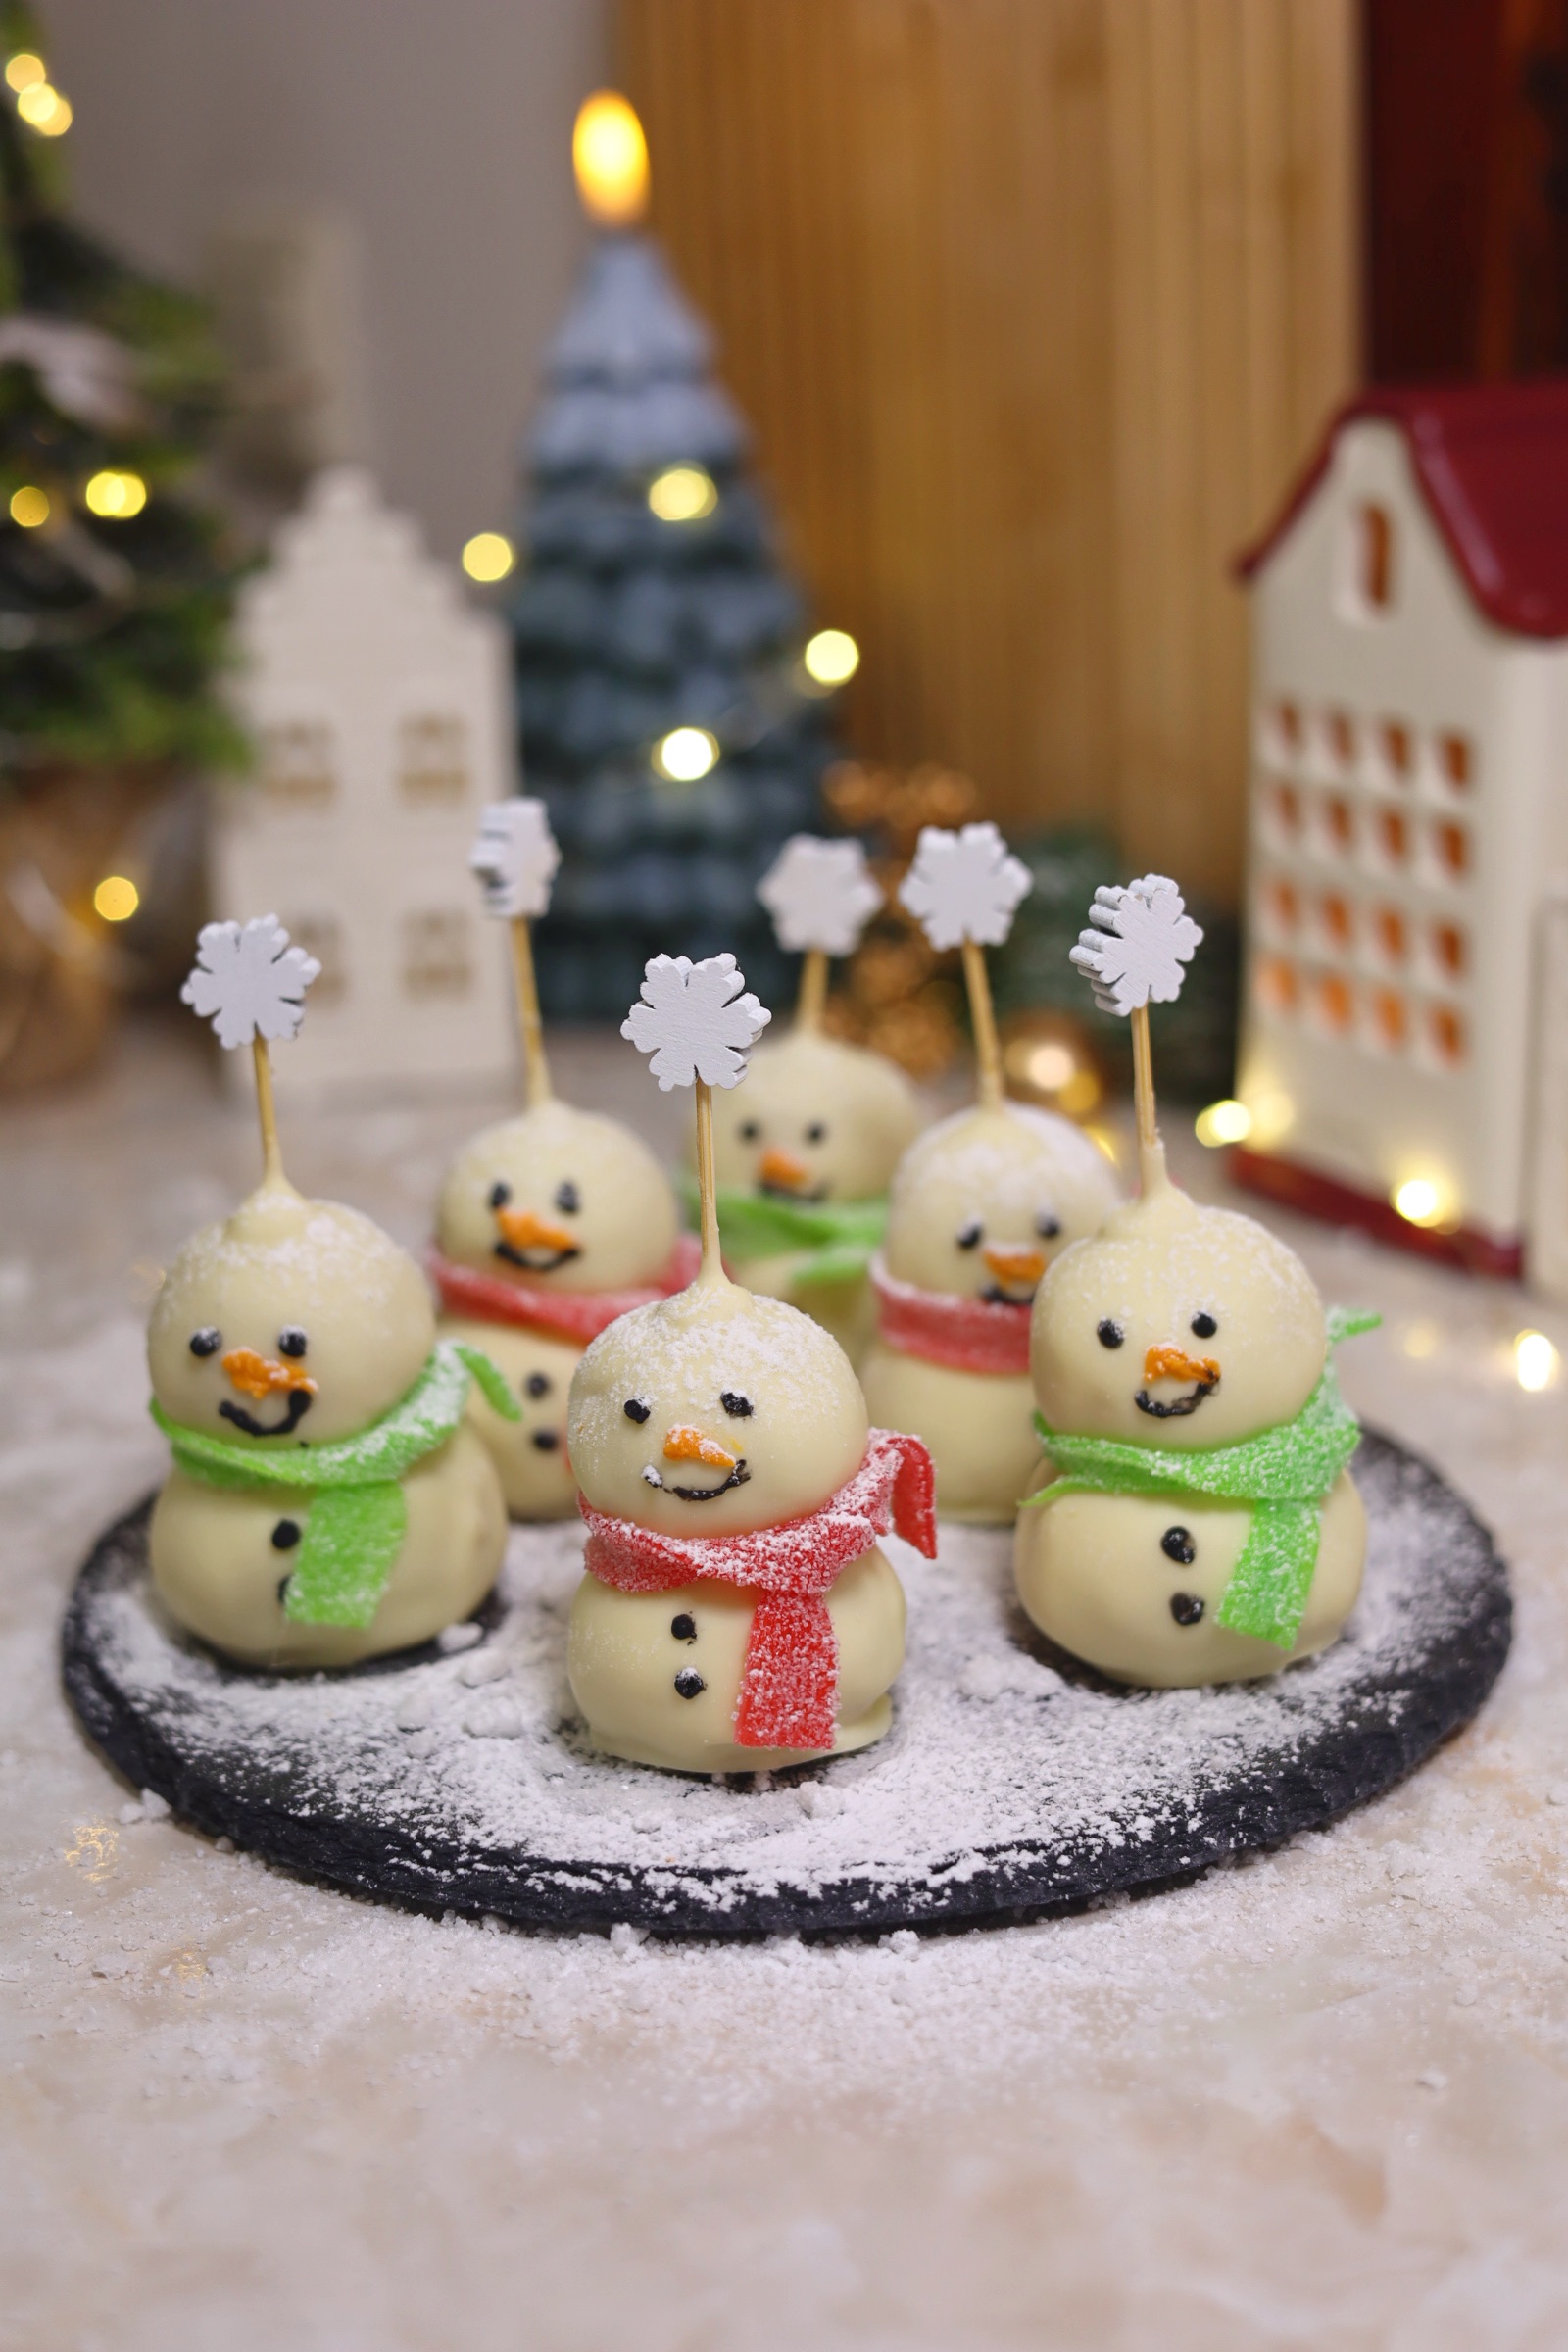
What I love most about these cake pops is how easy they are. You don’t need to be a professional baker or have fancy equipment. Crumbled cake mixed with frosting, rolled into balls, dipped in white chocolate, and suddenly: snowmen! Decorating is where the real fun begins. Little chocolate eyes, an orange nose, scarfs from the sour candy, and snow above their heads.
And the taste? Always a hit. Soft, sweet cake on the inside with a smooth, crunchy chocolate coating on the outside. Simple, delicious, and perfect for little hands. From my last experience, they disappear in minutes.
My top tips for making cake pops
When making cake pops, there are a few key things to keep in mind that will make the process easier and help ensure they taste amazing (which is the most important part, of course!).
Cake recipe: For classic vanilla cake pops, use your favourite vanilla or white cake recipe. To simplify things even more, you can absolutely use a boxed cake mix or store-bought ones.
Frosting: I do not recommend the store-bought icing though. Always use fresh home-made frosting/icing. Homemade frosting tastes much better and really makes a difference in this recipe.
Don’t overdo the frosting: Start by adding about three-quarters of the frosting to your cake crumbs and mix well. Check the consistency: if the mixture is moist enough to roll into balls, there’s no need to add more. If it’s still too dry, mix in the remaining frosting. Adding too much frosting can make the cake pops overly soft and mushy.
Cake balls: For perfectly round cake balls, roll them once, place them on a lined tray, and chill them in the freezer for 10 minutes (or in the fridge for 30 minutes). Then roll them again to smooth them out. After that, return them to the freezer for another 30 minutes (or the fridge for about 1½ hours). The cake balls need to be very cold so they keep their shape when inserting the sticks and so the chocolate sets more quickly when coating.
Chocolate: The chocolate you use for coating the cake balls makes a big difference. I highly recommend using candy melts or melting chocolate, as they melt to a much thinner consistency than regular eating chocolate, making dipping much easier. Candy melts also set faster, which means less dripping down the stick, and they harden firmly so you get that satisfying crack when you bite into a cake pop. If you prefer to use regular chocolate, thin it with a little vegetable oil and temper it to achieve the same smooth finish and clean snap.
Watch the chocolate and cake balls: While assembling, keep an eye on both the melted chocolate and the cake balls. The chocolate should remain fluid, if it starts to thicken, simply reheat it. If the cake balls begin to soften, place them back in the freezer for about 10 minutes (or in the fridge for another 30 minutes). Cake balls that are too soft may slide off the sticks when dipped.

For me, these snowman cake pops are more than just a recipe. They’re about creating memories, spending time together in the kitchen, and making something that brings joy to kids (and adults!) every single time. Whether it’s a Christmas celebration or a birthday party, these treats truly are an all-time kids’ favourite, and I don’t see that changing anytime soon. ❄️🍰

Snowman Cake Pops
Equipment
- 1 Large mixing bowl
- 1 Spatula
- 14 Sticks I used stick so it's easier for the kids to hold it
- 1 Small sauce pan to melt the chocolate
- 1 Small spoon
- 1 Fork
- 1 Cutting Board To place the cake pops
- 1 Baking paper To layer it on the cutting board
Ingredients
Cake Pops Base
- 1 pcs Sponge Cake We used vanilla flavour. You can use store bought one or make your own.
- 2-3 tbsp Cream cheese frosting Adjust while mixing
- 300 gr White Chocolate or White Candy Melts Honestly candy melts works better than chocolate, but I didn't have enough time to order it. I prefer candy melts because they set quickly and are thinner when melted. If you use normal chocolate, then I would recommend thinning the chocolate out with some vegetable oil.
- Orange food coloring for the nose of the snow pop
- Dark chocolate for the eyes, mouth and buttons
Instructions
- In a large mixing bowl, place the sponge cake and break the cake apart with your hands and crumble it up until is resembles fine crumbs.
- Add in your pre-made cream cheese frosting. Mine was made from 100ml whipped cream + 150gr mascarpone cheese + 1tsp vanilla essence + 100gr powdered sugar.
- Add the frosting gradually as you mix them well, until you get the clay feeling of your cake. At this stage, if you feel the cake is moist enough to roll into balls then don't add anymore frosting in. If you add too much frosting, you cake pops will be too mushy and easily broken.
- Roll two balls of different sizes for the head and body of the snowman, and place them on a plate or tray. Place them in the freezer for about 10minutes of fridge for 30 minutes. This will help the cake balls become firm, smooth/round and easy to work with.
- Once your balls are ready, melt your chocolate. I used double boiling method (bain-marie). Here's how it works.Fill a saucepan with a small amount of water (about 2–3 cm). Make sure the water does not touch the bottom of the bowl you’ll place on top.Bring the water to a simmer, not a full boil.Place a heatproof bowl on top of the saucepan and add the chocolate to the bowl.Stir the chocolate slowly as it melts. The steam from the hot water gently heats the bowl and melts the chocolate evenly.Remove from heat once the chocolate is smooth and fully melted.
- I added only 70% of my chocolate to melt, and added the rest of my chocolate once the first one already fully melted, so the chocolate won't be too hot to work with and cracked if it's touched with the cold cake.
- Dip the tip of each cake pop stick into the melted chocolate, then insert it halfway into a cake ball. Repeat with the remaining cake pop sticks.
- I used fork to support the body of the snowmen while coating them with chocolate using tea spoon.
- Once all of the snowmen coated, place them on a tray/cutting board layered with baking paper and place them in the fridge for 30 minutes until the chocolate is set and take them out one by one to decorate them with the eyes, nose, mouth, and shawls.
- After decorating, pop them back to the fridge for 5 minutes and they are ready to serve! Enjoy! 🙂
Leave a Reply