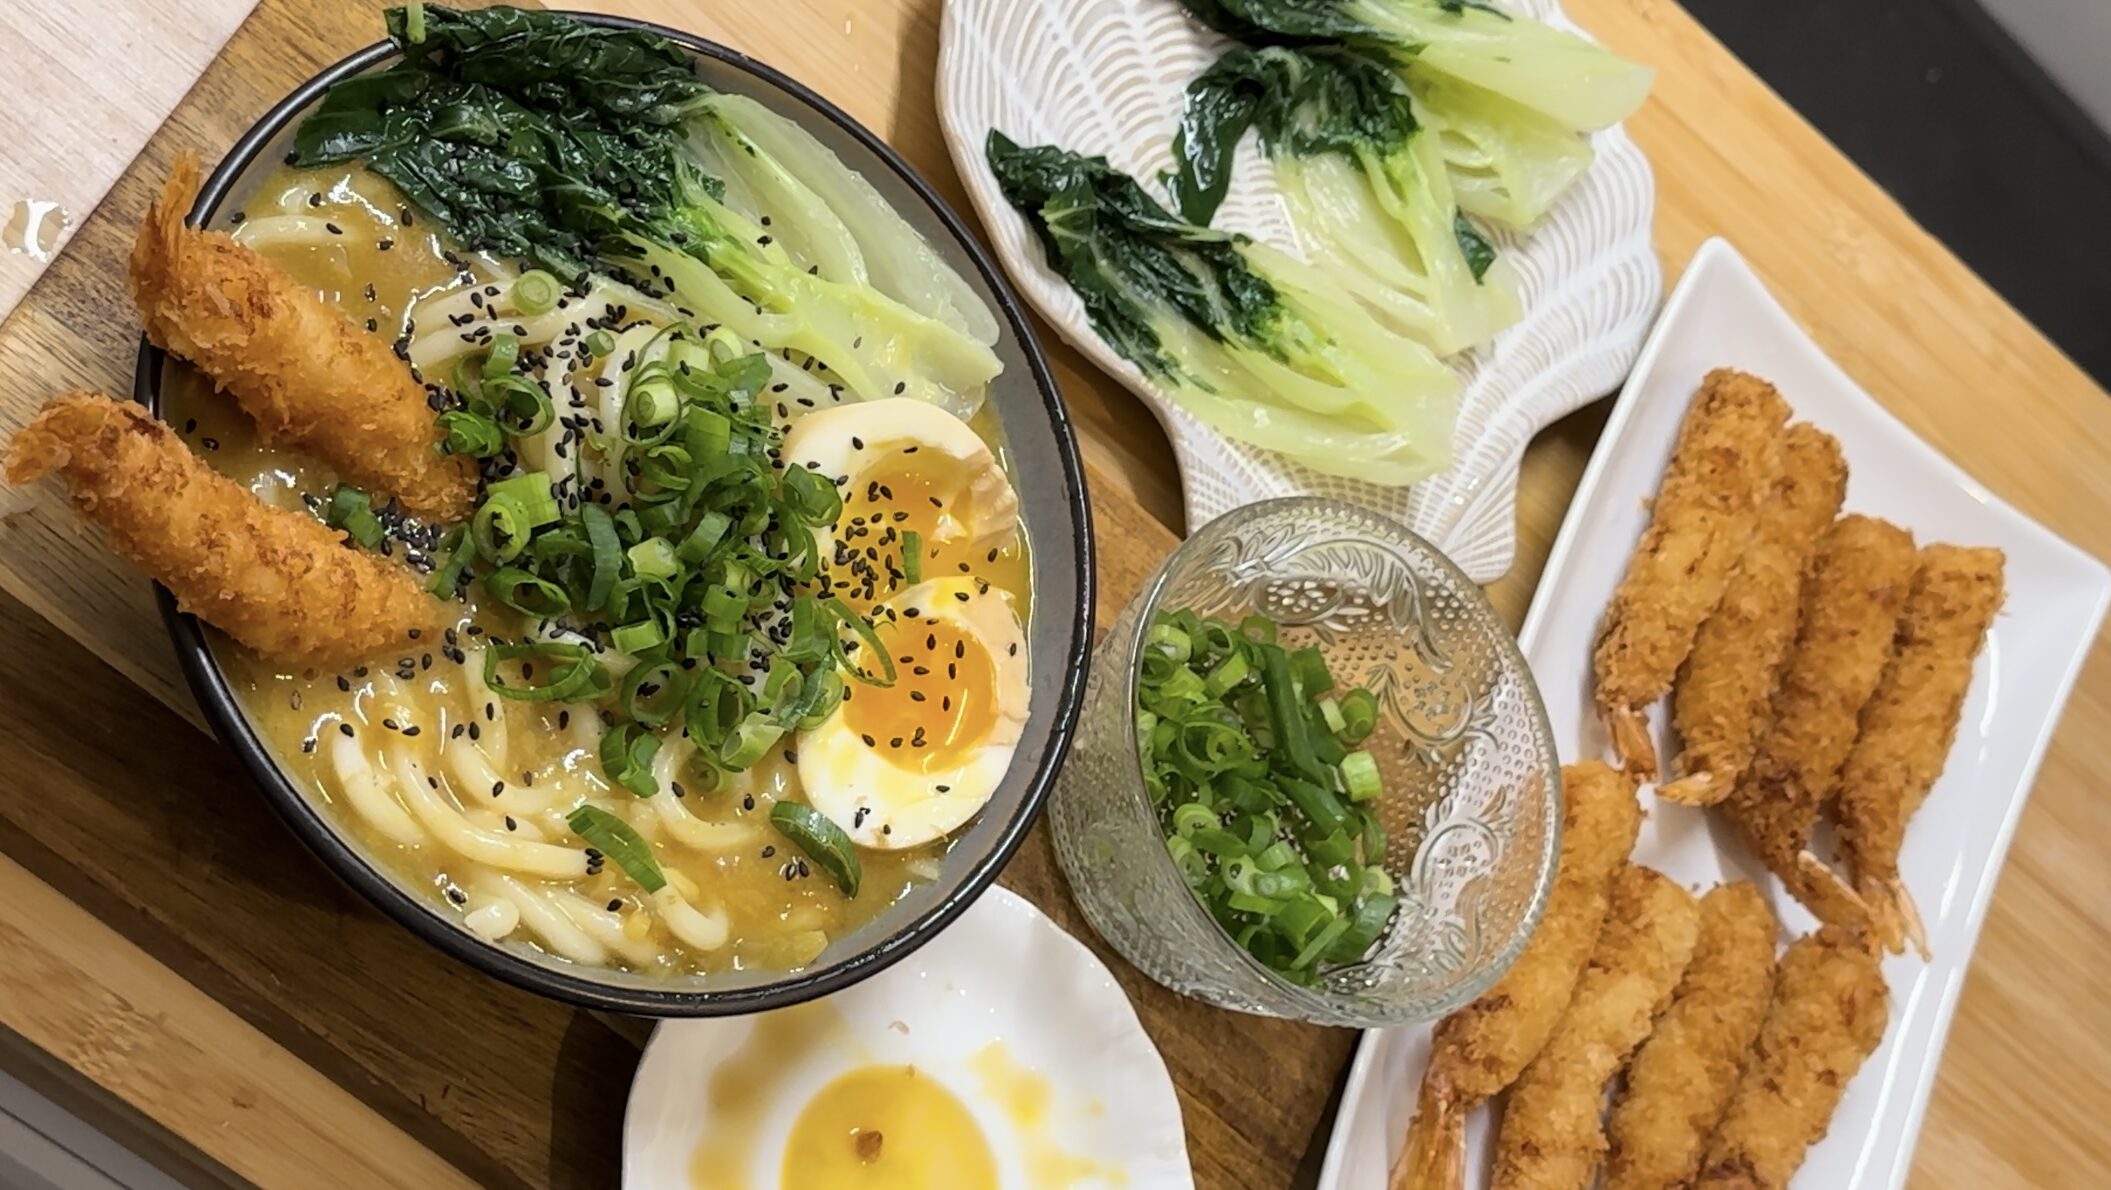
Curry Udon with Shrimp Tempura has always been a staple comfort food in my family, bringing warmth and happiness to our table. There’s something about the rich, flavourful curry broth paired with thick, chewy udon noodles that instantly soothes the soul. Add crispy, golden shrimp tempura on top, and it becomes a meal we can’t resist, no matter the season. Whether it’s a rainy evening or a weekend gathering, this dish never fails to make everyone smile. It’s more than just a meal for us—it’s a tradition that brings us together, one comforting bowl at a time.

I love making batches of shrimp tempura in advance and freezing them—it’s my secret to quick, delicious meals on busy days! Having crispy, golden shrimp ready to go means I can easily elevate dishes like ramen, curry udon, or even a simple salad without the hassle of starting from scratch. The tempura freezes beautifully, staying light and crunchy once reheated. It’s a huge time-saver and lets me enjoy restaurant-quality shrimp tempura whenever I want, without the fuss!
When it comes to making ramen eggs, I always like to prepare them at least 6 hours ahead or, even better, the night before. Letting them marinate for that long allows the eggs to soak up all the savory, sweet flavors, making each bite rich and satisfying. The texture also improves as the egg whites firm up just right while the yolk stays perfectly soft and runny. Prepping them in advance makes them even more convenient, so when I’m ready to enjoy a bowl of ramen, or just with a plain cooked rice, my flavourful eggs are ready to go!

Here are some quick tips for making Curry Udon with Shrimp Tempura:
- Shrimp Tempura: Keep the batter cold and fry in hot oil (around 350°F/180°C) to achieve a light, crispy texture. Make batches in advance and freeze for easy use!
- Curry Broth: I used Japanese Golden Curry for an easy, rich broth. Add dashi or chicken stock for depth and balance the flavour with miso paste and mirin.
- Udon Noodles: Cook udon separately, rinse with cold water to remove excess starch, then add to the broth just before serving.
- Assembly: Ladle curry broth over noodles, and top with shrimp tempura just before serving to keep them crispy!
To keep Curry Udon with Shrimp Tempura fresh and maintain its best texture, follow these steps:
- Store Separately: Keep the curry broth, udon noodles, and shrimp tempura in separate containers. This prevents the tempura from getting soggy and the noodles from absorbing too much broth.
- Refrigeration:
- Curry Broth: Store in an airtight container in the fridge for up to 3 days.
- Udon Noodles: Rinse and store them in a separate container with a bit of water to prevent sticking. They last 2-3 days in the fridge.
- Shrimp Tempura: Store cooked tempura in the fridge for up to 2 days or freeze for longer storage.
- Reheat Carefully:
- Curry Broth: Reheat on the stovetop until hot.
- Udon Noodles: Briefly dunk them in hot water to warm up.
- Shrimp Tempura: Reheat in the oven or air fryer to restore crispiness (avoid microwaving to prevent sogginess).
- Assemble When Ready: Combine the noodles and curry broth, then top with reheated shrimp tempura right before serving to keep everything at its best.
Making Curry Udon with Shrimp Tempura at home is not only rewarding but also a great way to bring comfort and warmth to your table. The rich, savory curry, chewy udon, and crispy shrimp tempura create the perfect balance of flavors and textures. Whether it’s a cozy weeknight dinner or a special gathering, this dish is sure to delight. So why not try it at home and enjoy it with your loved ones? It’s more than just a meal—it’s a shared experience that’s bound to become a family favourite!
Curry Udon Shrimp Tempura
Equipment
- 1 Medium sized pot I use the same pot for boiling the noodles and boiling the baby bokchoy
- 2 Small sized sauce pan 1 to boil the eggs and 1 to make the curry sauce
- 1 Skillet
- 1 Knife
- 1 Cutting Board
- 3 Bowls for the shrimp tempura
- 3 Serving bowls
Ingredients
Shrimp Tempura
- 10 pcs Tiger shrims scored the belly so it won't be curled when fried
- 200 gr Panko bread crumbs
- 1 pcs Egg
- 100 gr All purpose flour
- 1 tsp Garlic powder
- 1 tsp Onion powder Mine is already salted, so I didn't add salt anymore
- ½ tsp White pepper
- ½ pcs Lime, squeeze the juice
- 500 ml Neutral oil to deep fry
The Japanese soft-boiled egg (Ajitsuke tamago)
- 3 pcs Large eggs
- 125 ml Soy sauce
- 125 ml Water
- 60 ml Mirin (sweet rice wine)
- 1 tbsp Sugar (optional)
- Ice in a bowl with water
General Ingredients
- 3 packs Udon noodles
- 3 pcs Japanese soft boiled egg (Ajitsuke tamago) or you can use normal soft boiled egg
- 2 pcs Spring onion Chopped
- 1 tsp Sesame seeds
- 200 gr Baby bokchoy
- 1½ Liter Water to boil
For the curry
- 2 tbsp Neutral oil
- 4 cloves Garlic Minced
- 1 pcs Yellow Onion Chopped
- 3 cm Ginger Chopped
- 2 tbsp White miso paste
- 5 Pcs Japanese curry blocks I used the brand Golden curry
- 1 Liter Hot water I used it to dilute the Dashi broth powder
- 2 Sachets Dashi powder Dilute in hot water
- 3 tbsp Mirin
- 2 tbsp Sesame oil
Instructions
Shrimp Tempura
- Clean the shrimps and peel the skin but leave the tails on. Wash the shrimp under the running cold water briefly. Season the cleaned shrimp with salt and lime. Set aside
- In bowl 1, add in an egg, beat the egg. In a bowl 2, add in flour and season with garlic powder, onion powder, and pepper. In a bowl 3, add in panko breadcrumbs.
- Take the shrimp 1 by 1 to the bowl with seasoned flour, and then dip it in the egg bowl, and then in the panko. Press the shrimp gently into the panko until it's well-coated. Repeat this step until all the shrimps are breaded.
- Deep fry the shrimps in a pre-heated oil in a medium-low heat until golden brown. Set aside.
The Japanese boiled egg
- In a small pot with boiling water, add in eggs. Cook for 6 – 6½ minutes and then transfer directly to cold iced water bowl. Let them sit for 5-10 minutes or until the ice melt.
- In a small deep bowl, add in all the egg marinade ingredients. Stir until well-combined.
- Peel the eggs. Be careful as soft-boiled eggs are delicate. Place the peeled eggs into the marinade. Ensure they are fully submerged—if not, you can weigh them down with a small plate or use a bag.
- Marinate for 4-12 hours in the fridge. The longer they marinate, the more flavour they absorb. However, if left for too long (over 24 hours), they might become too salty.
The curry soup
- Chop all the aromatics; Garlic, Onion, and ginger. Set aside
- In a small sauce pan, boil water and cook the baby bockchoy for about 6 minutes or until they are slightly tender. After that you can opt to rest them in a bowl of cold water to stop them from cooking and keep the vibrant color of the bokchoy. Set aside.
- In the same pot used to cook bokchoy, with still boiling water, add in the Udon. I used the fresh Udon, so it's only took 2-3 minutes to cook. If you used the dried udon, cook it for around 8-10 minutes or you can follow the package instructions accordingly. After that you can opt to rest them in a bowl of cold water to stop them from cooking and keep the vibrant color of the bokchoy. Set aside.
- In a pre-heated medium sized pot, add in oil, and heat up a little bit and then add in all the chopped aromatics. Sauté until all wilted, then add the miso paste and stir until well combined.
- Pour in dashi broth and curry blocks. Cook in a low heat until simmering and stir until well-combined and the soup has thicken.
Serving
- In a serving bowl, place the udon, and then pour the curry soup over it.
- Place the toppings; baby bokchoy, ramen eggs, tempura, chopped green onion, and sprinkle some black sesame seeds. Serve and enjoy! 🙂


Leave a Reply