
If you ever came over to my house for lunch, there’s a good chance I’d make these Peking-style bao buns for you. 😊
I made Peking duck for an Easter dinner with my best friends, and let me tell you, it was an absolute hit! Everyone couldn’t get enough of it and they’re still talking about it! But honestly, it took two full days of prep and a whole lot of wrestling with a duck. So, I decided to create a shortcut that still delivers all those amazing flavours and textures: Peking-Style Crispy Chicken Bao Buns. Still delicious, but in a more accessible twist on the classic.
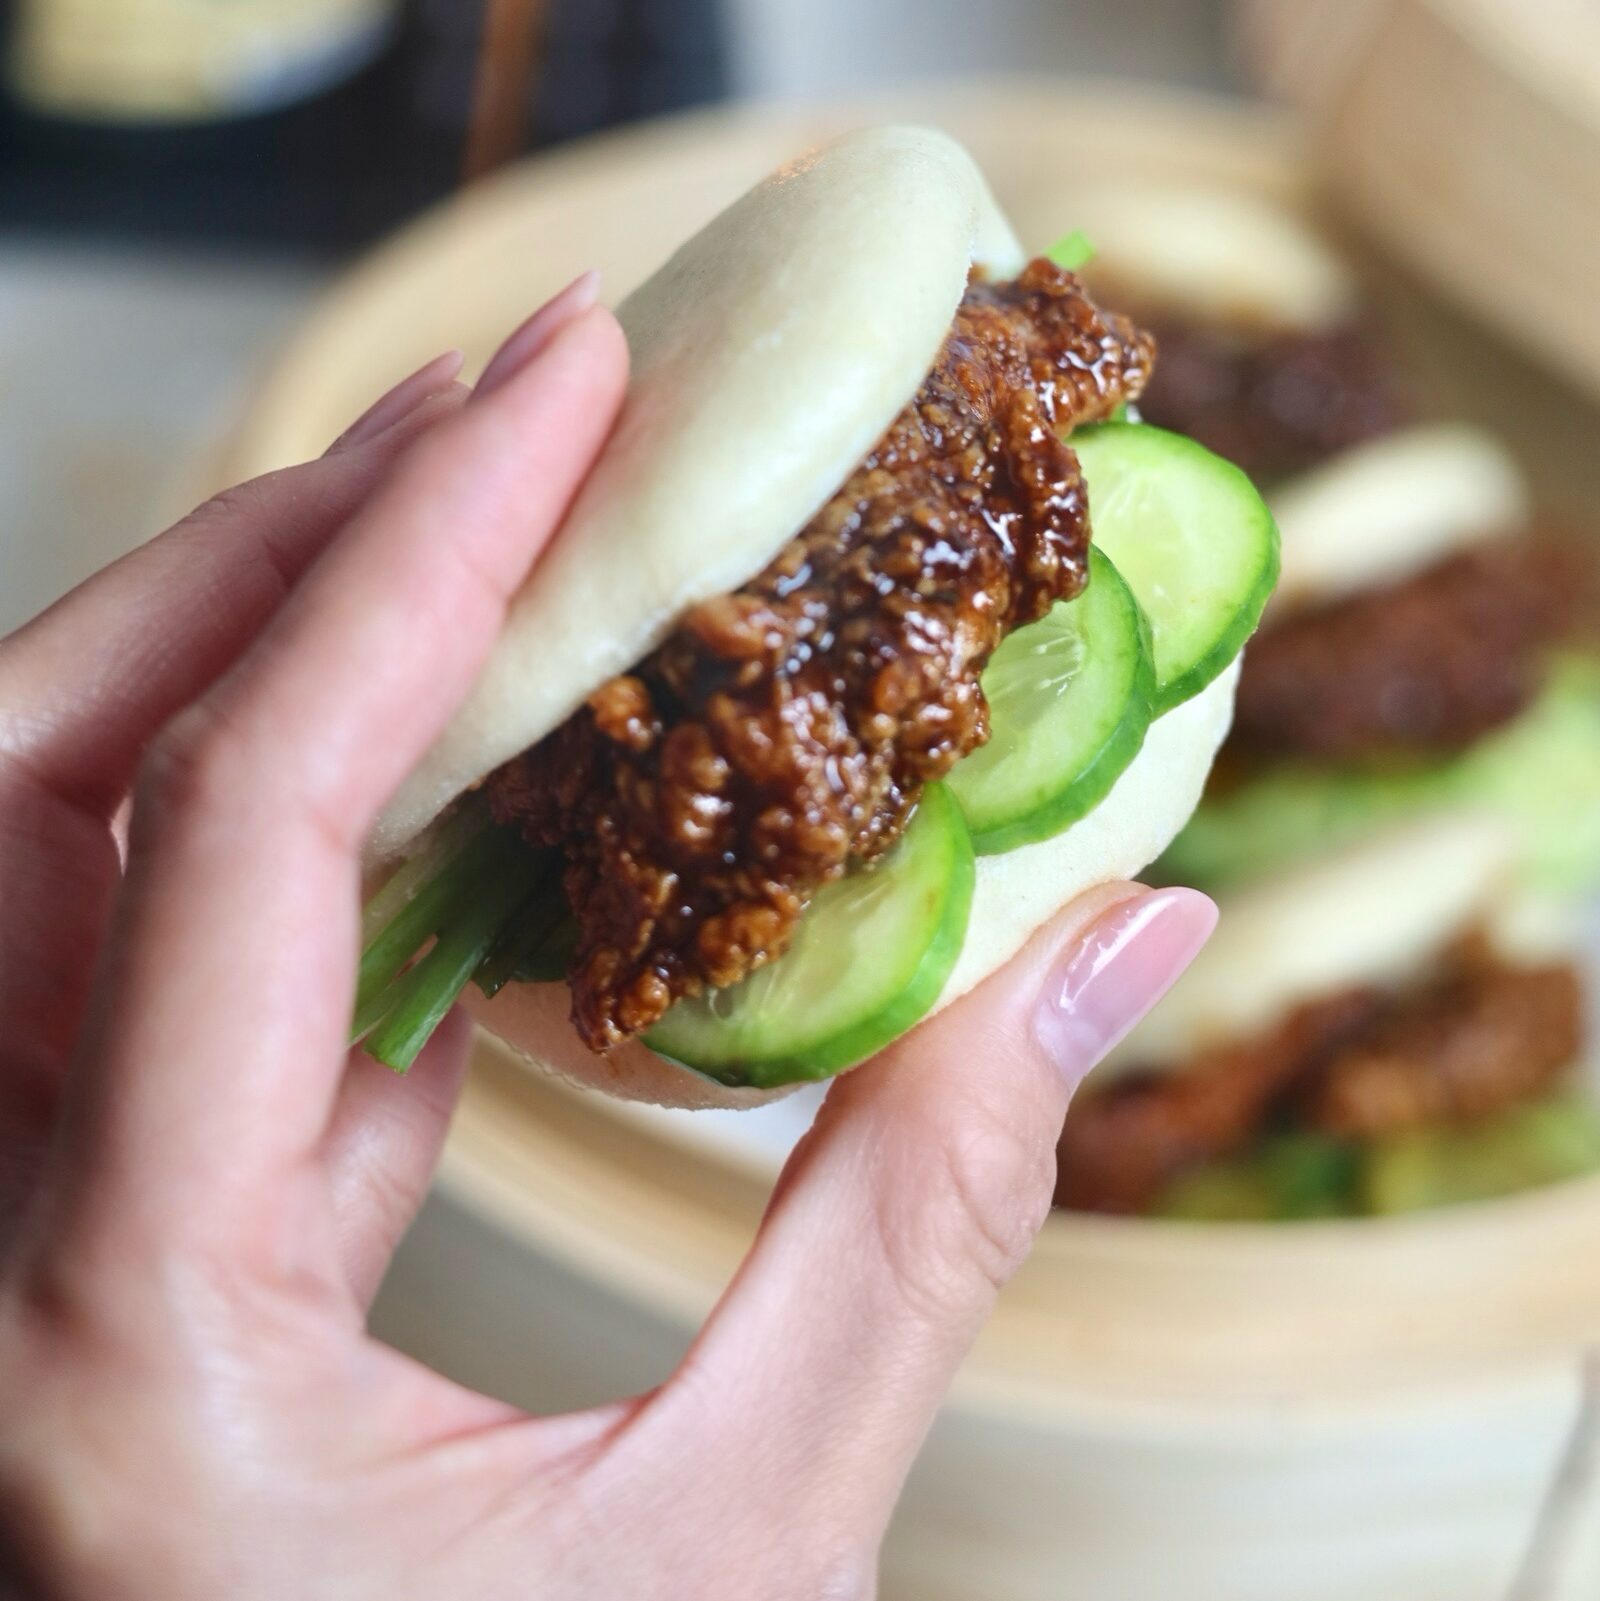
The combination of textures and flavours in each bite is incredible! The fluffy bao buns paired with sticky glazed crispy chicken are perfect combo. You can taste the signature Peking duck flavour, along with fresh cucumber and green onion, and it’s just downright addictive!
Whether you’re planning a lunch party, gathering, treating yourself to a flavourful weeknight meal, or introducing a new recipe to your family, this dish is guaranteed to impress. Glazed crispy chicken nestled in a warm, fluffy bao bun and topped with fresh vegetables, what’s not to love?
Behind Peking-Style Crispy Chicken
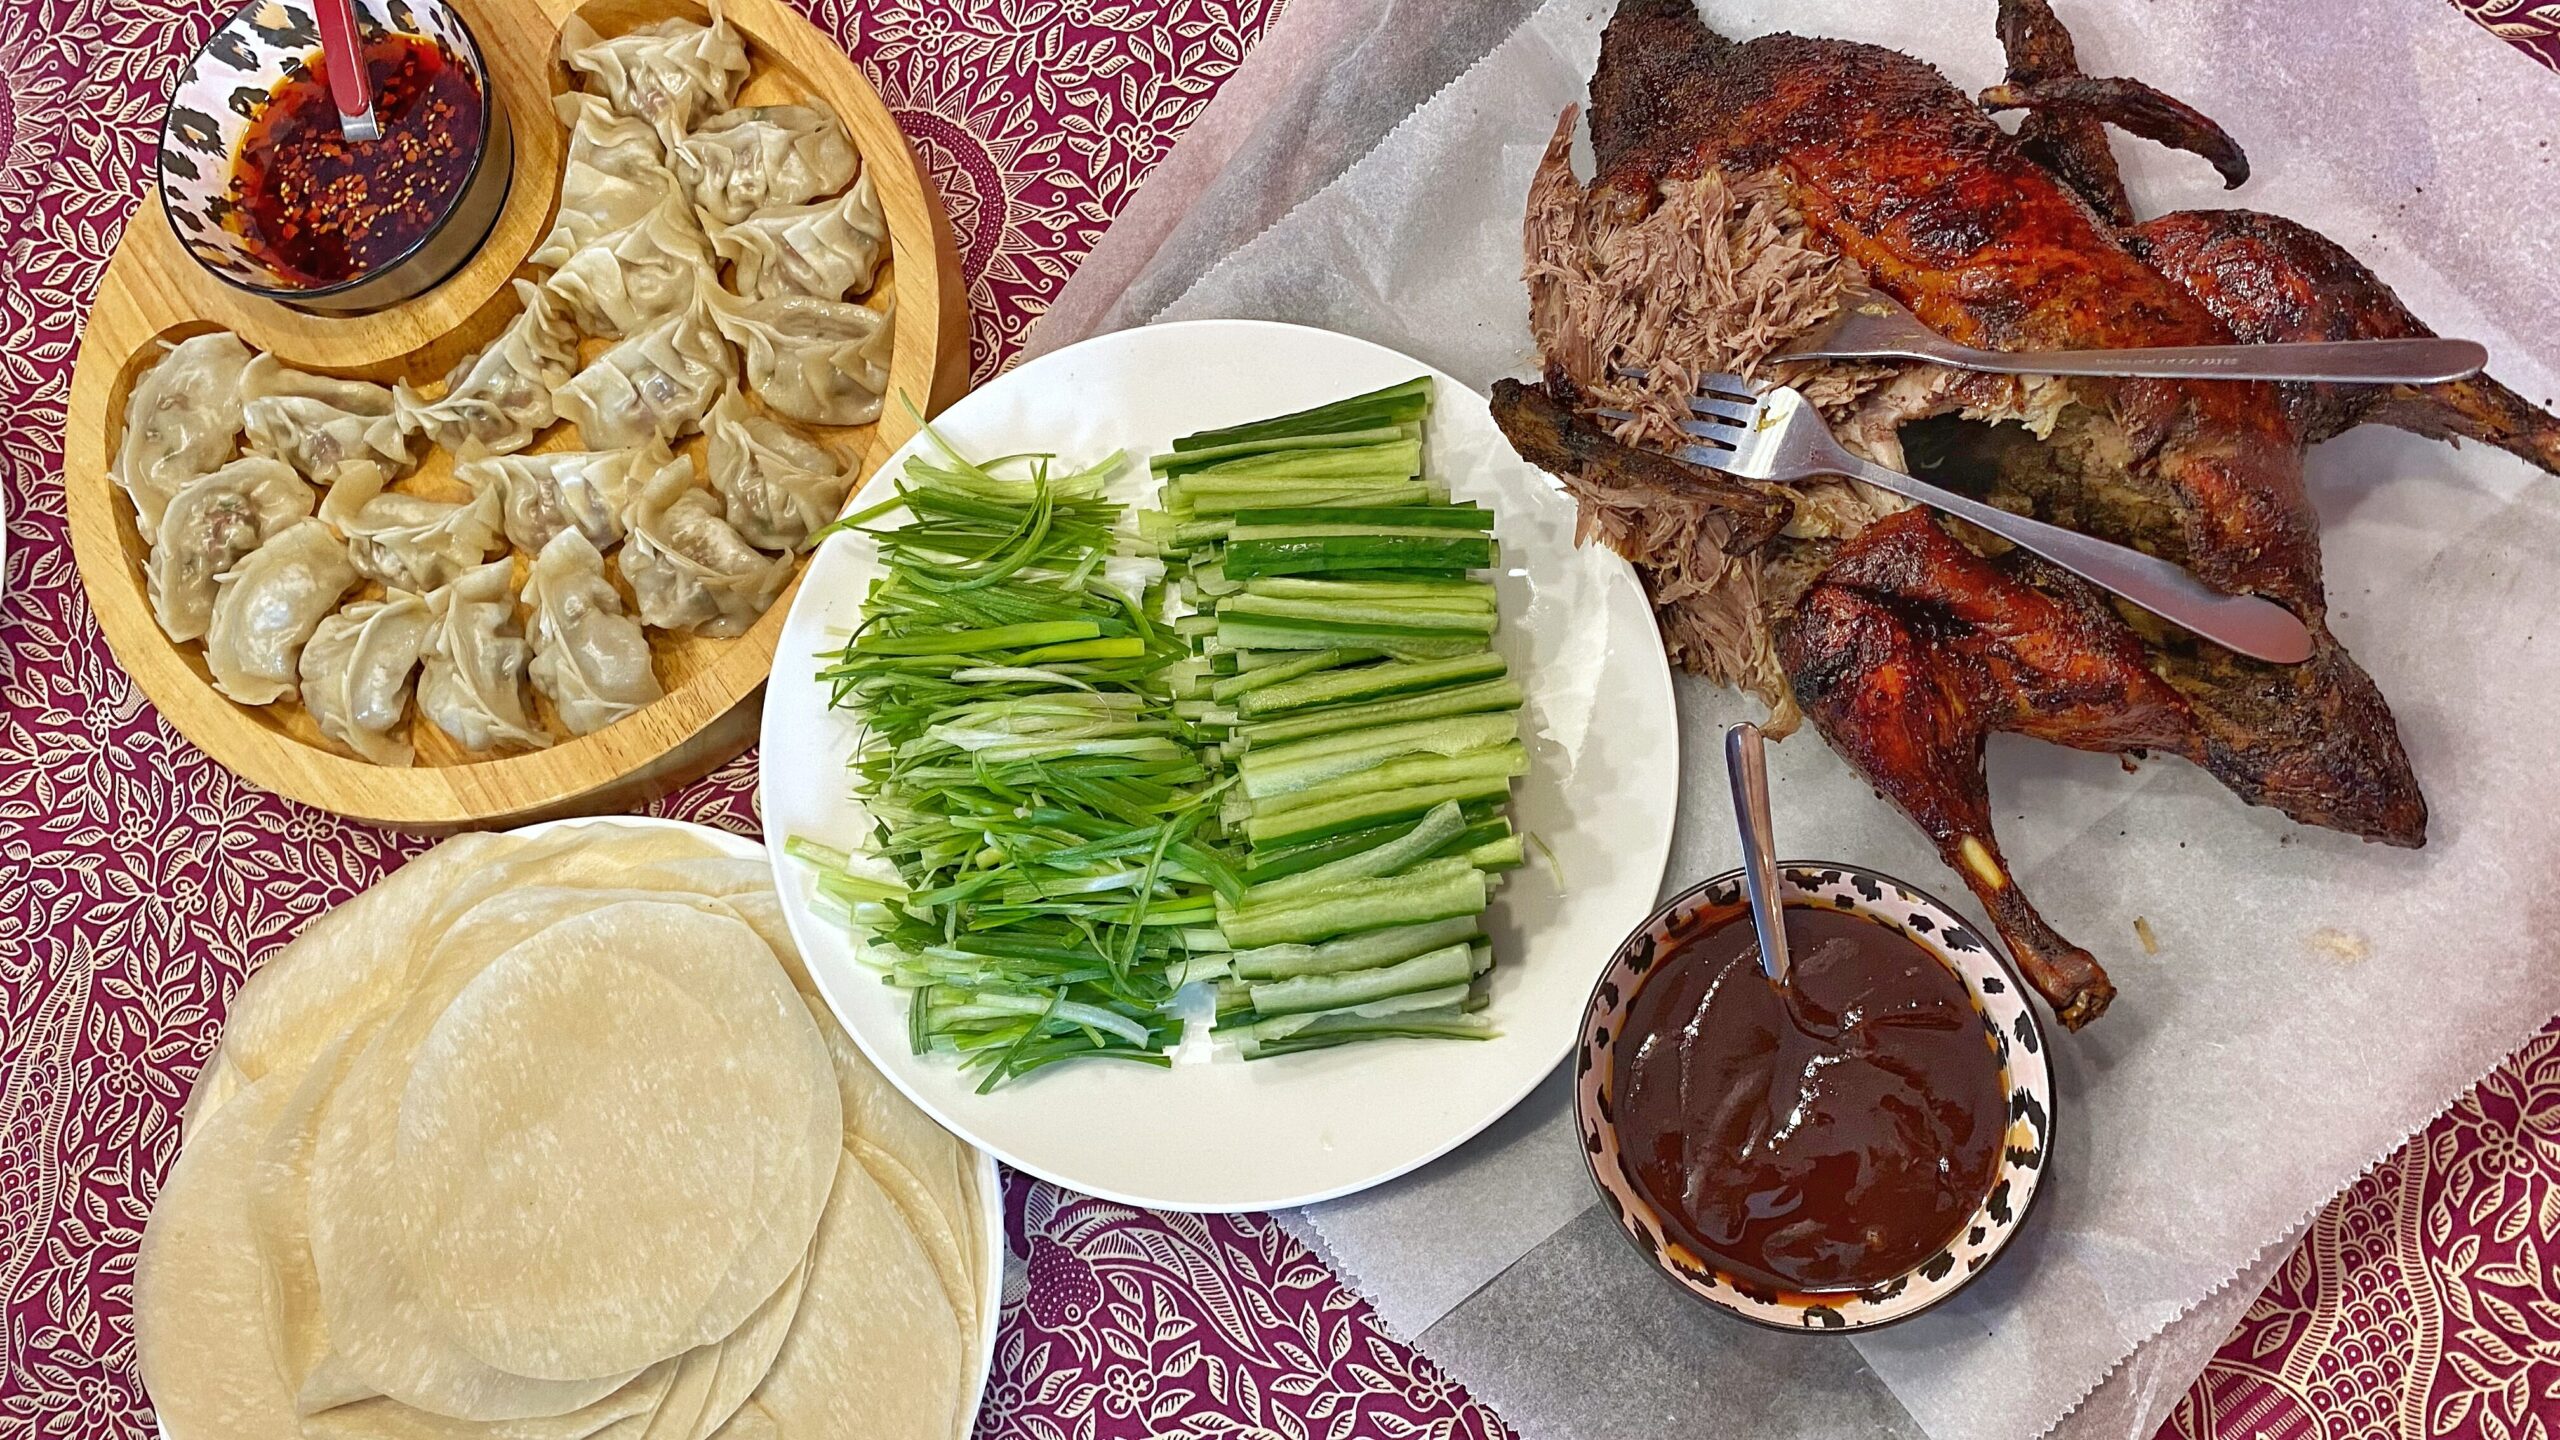
Traditional Peking duck is famous for its crispy skin and succulent meat, usually served with thin pancakes, hoisin sauce mixture, and fresh veggies. The crispy skin is the star of the show, and the concept behind the Peking-style crispy chicken bao buns is to capture that same crispy goodness, but with a more convenient protein: chicken.
So, what makes the chicken so crispy? The secret is in the double-frying/bake technique. First, the marinated chicken is coated in a light, seasoned flour mixture, then fried to golden perfection. The second fry or oven bake adds an extra crunch, creating that satisfying crispy layer you crave. It’s the perfect texture contrast when paired with the soft bao bun. I honestly prefer to toss it in the oven to create that crunchiness instead of double frying it to avoid extra greasiness.
Key Ingredients You’ll Need
For this dish, you’ll need some key ingredients that are packed with flavor and texture:
Chicken Thighs (Bone-in or Boneless): You can use boneless skinless thighs for a more straightforward cooking process. Chicken thighs are perfect for this recipe because they stay juicy while the skin crisps up beautifully.
Bao Buns: Soft, fluffy bao buns are essential. You can either make them from scratch or use store-bought buns if you’re short on time. Steaming them makes them light and pillowy, a perfect base for the crispy chicken.
Hoisin Sauce: This rich, slightly sweet and tangy sauce is the traditional condiment for Peking-style dishes. A generous drizzle adds depth to the chicken, giving it that signature flavour on the glaze.
Shaoxing Wine: This traditional Chinese rice wine adds depth and complexity to the marinade, giving the chicken a subtle, fragrant flavour. It’s essential for creating that authentic taste.
Soy Sauce: Soy sauce enhances the savoury umami flavour of the chicken while also helping to tenderize the meat. It’s one of the key ingredients in the marinade and glaze that brings everything together.
Egg: Adding egg to the marinade helps bind the flavors and create a light, crispy coating on the chicken when fried. It gives the chicken that golden, crispy texture everyone loves.
Chinese Five-Spice Powder: This spice blend brings a mix of sweet, savoury, and aromatic flavours to the crispy chicken. It includes cinnamon, cloves, fennel seeds, star anise, and Sichuan peppercorns.
Cornstarch & Baking Powder: For that extra crispy coating, the addition of cornstarch & baking powder ensures the chicken becomes golden and crunchy.
Honey: Honey adds a touch of natural sweetness that balances out the savory and spicy flavors. It helps give the chicken a slightly caramelized finish when it’s glazed. In classic peking duck recipe, they use glucose syrup or maltose syrup that you can find in Asian markets. I honestly don’t really like to work with it as it’s hard in consistency, especially during cold days, so it needs to be soften first. That’s why I opted for honey.
Brown Sugar: Brown sugar enhances the richness of the marinade, contributing to a deeper, molasses-like sweetness.
How to Make Peking-Style Crispy Chicken Bao Buns
Step 1: Marinate the Chicken
Cut the chicken into bite size and add them in a mixture of egg, soy sauce, shaoxing wine, brown sugar, five-spice powder, and sesame oil. Let it sit for at least 30 minutes to allow the flavours to soak in.
Step 2: Prepare the Coating
While the chicken is marinating, mix together flour, corn starch, baking powder, salt & pepper. Coat the marinated chicken in the dry mixture, shake and massage/press as you go until all the chicken pieces well-coated. This is what will give you that crispy golden exterior after frying.
Step 3: Double Fry/bake the Chicken
Heat a pan or deep fryer with oil over medium heat. Fry the chicken in batches to avoid overcrowding. The first fry should cook the chicken through, while the second fry will crisp it up beautifully. This time I opted to bake it for 10 minutes in a pre-heated oven to not overuse oil. Once done, set the chicken aside on a paper towel to absorb excess oil.
Step 4: Steam the Bao Buns
While the chicken is frying, steam the bao buns according to the package instructions (usually 5-10 minutes). You want them soft, light, and warm when you assemble the dish.
Step 5: Make the Glaze
In a medium skillet, add in hoisin sauce, soy sauce, honey/sugar, rice vinegar, and water. Stir until well-combined and let it simmer for about 1-2 minutes. Let it cool before coating the crispy chicken. Once the glaze slightly cools, add in the crispy chicken in the glaze and coat it evenly. Do not soak the crispy chicken.
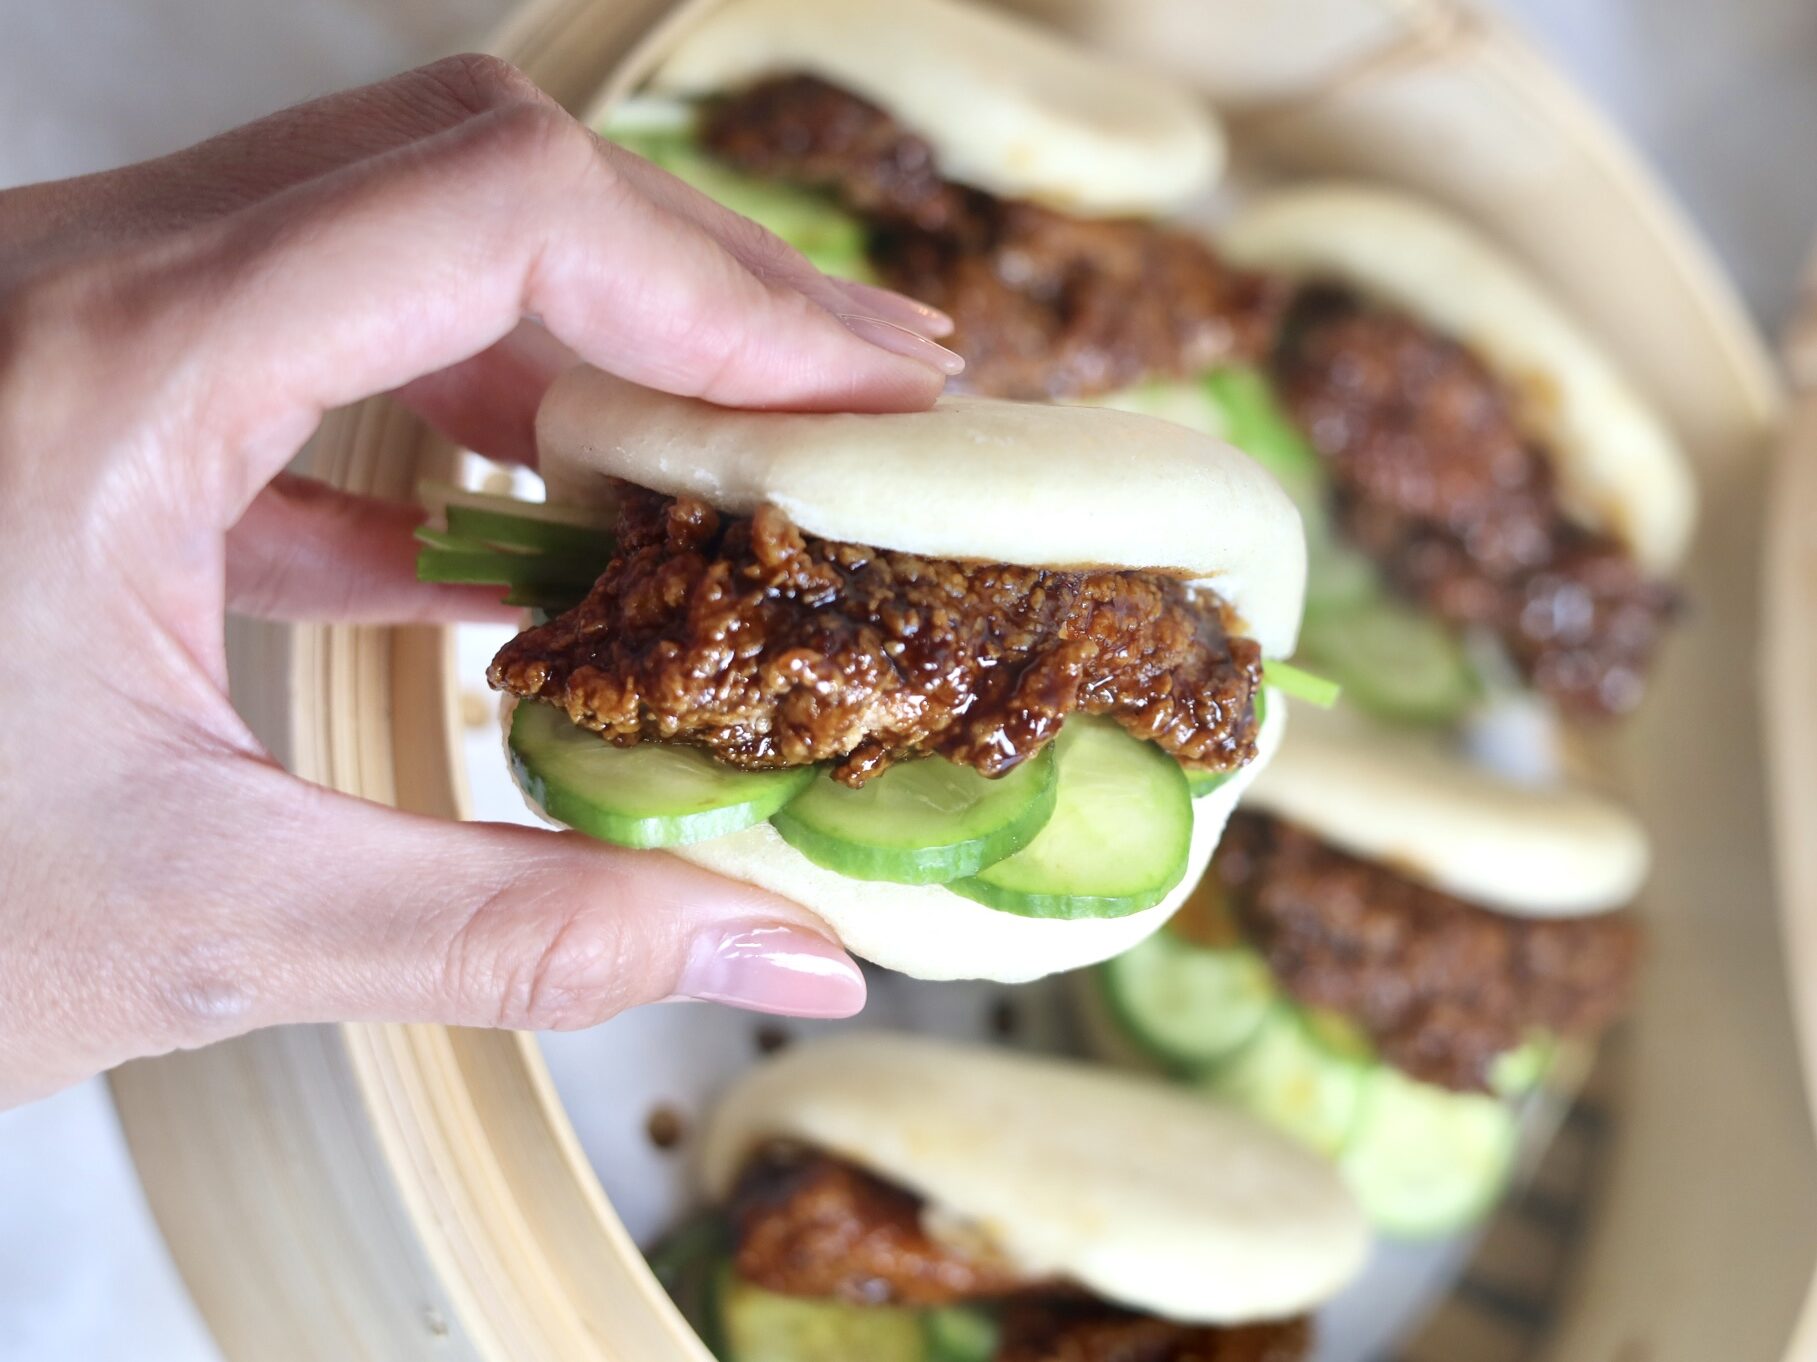
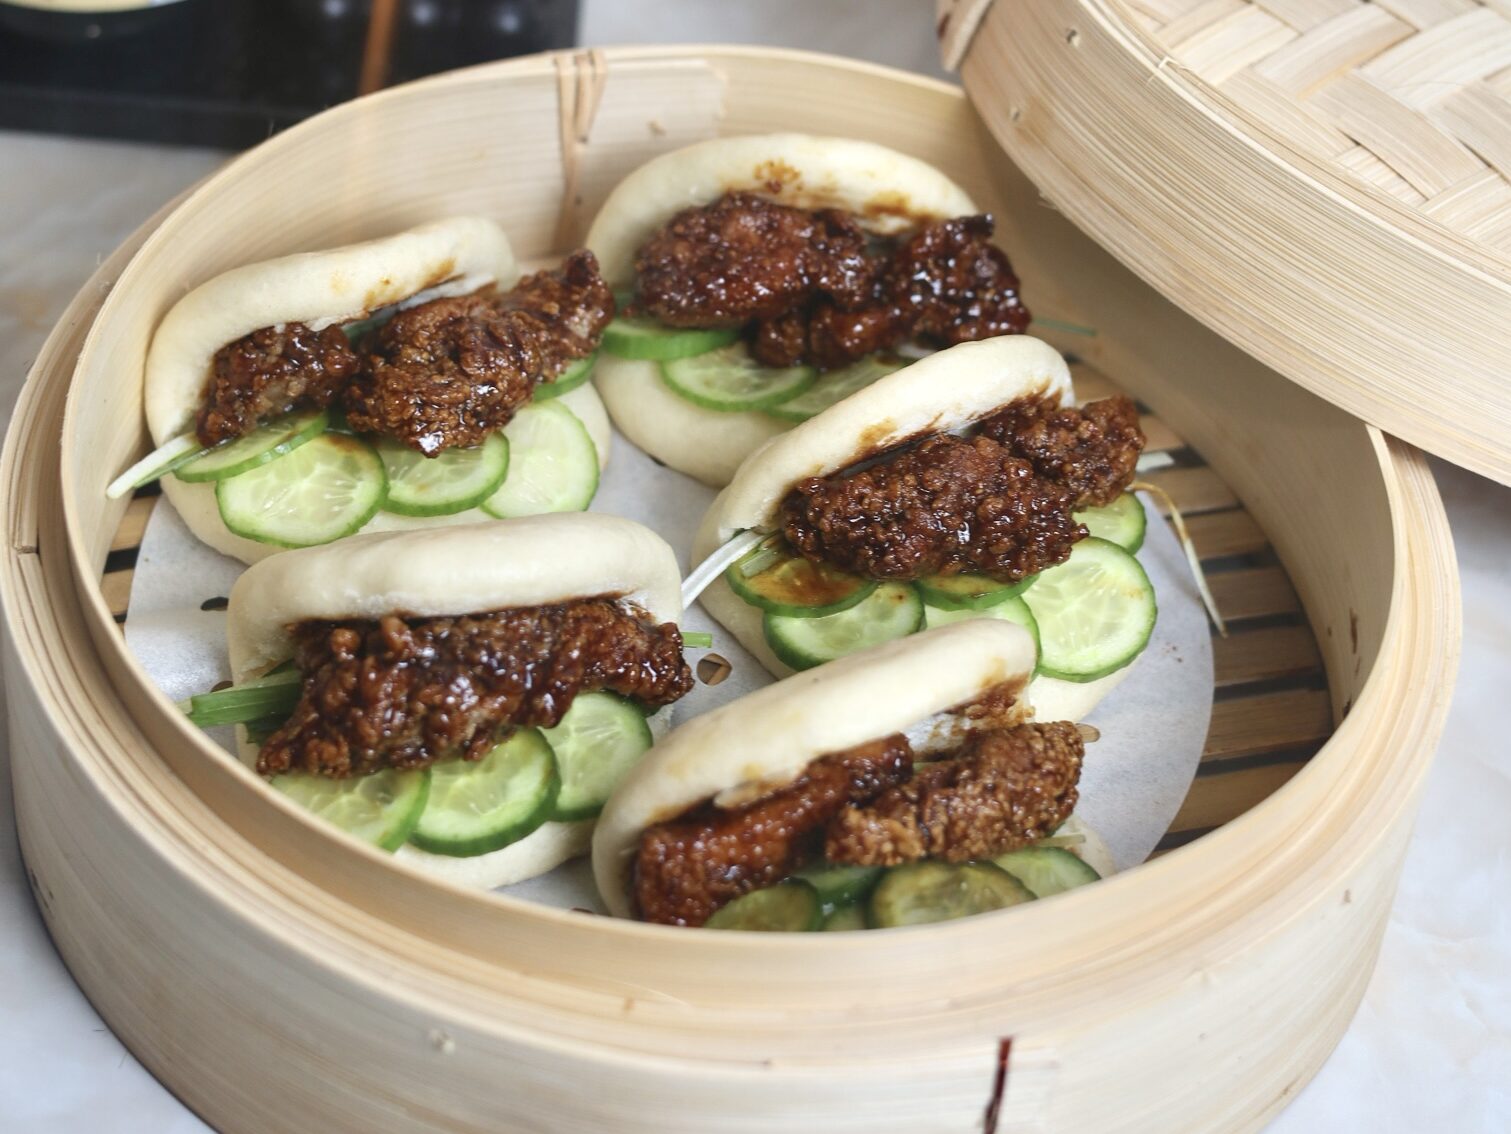
Step 6: Assemble the Bao Buns and Serve!
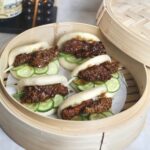
Open up the steamed bao buns and layer in the cucumber slice, julienned green onion, and the glazed crispy chicken. Serve the bao buns immediately, ideally while the chicken is still hot and crispy.
These buns make a perfect lunch, appetizer, snack, or even a full meal when paired with some stir-fried vegetables or a simple soup. Try this at home and follow for more! 🙂
Make-Ahead Meal
If you’re looking for a meal that’s both delicious and convenient, these Peking-style crispy chicken bao buns are the perfect choice. Not only do they taste amazing fresh, but they also make an excellent make-ahead meal. Whether you’re prepping for a busy week or need a quick lunch, these bao buns can be easily assembled in advance and stored for later enjoyment.
How to Make Ahead
Prepare the Chicken in Advance
You can marinate and fry the chicken the night before. Once the chicken is cooked and crispy, allow it to cool completely before storing it in an airtight container in the fridge. The chicken will stay crispy and juicy, especially if you reheat it properly (more on that below!). For longer storing, you can keep the fried chicken in the freezer up to 6 months.
Reheating Tips
- For the Chicken: To maintain the crispiness, reheat the chicken in a hot pan, or air fryer for about 5 minutes and in the pre-heated oven for about 10 minutes (it takes a bit longer if you have it frozen) until it’s sizzling and crispy again.
- For the Bao Buns: Steam the bao buns for 5-6 minutes until soft and warm, or if you prefer, you can microwave them for 30 seconds with a damp paper towel over them to keep them moist.
Perfect for Lunch!
These Peking-style crispy chicken bao buns are a great option for lunch boxes or a quick meal on the go. Simply pack them up, and you’ve got a satisfying lunch that’s both fresh and flavourful. Plus, since they’re easy to store and reheat, they’re perfect for meal prepping ahead of a busy week.
Let me know if you try this at home! 🙂
Peking-Style Crispy Chicken Bao Buns
Equipment
- 1 Medium sized mixing bowl
- 1 Knife
- 1 Mixing bowl/ziplock bag
- 1 Frying pan
- 1 Skillet
- 1 Cutting Board
- 1 Spatula
Ingredients
- 12 pcs Bao Buns
- 500 gr Chicken thighs. Cut into bite size
- Oil for deep frying
- Cucumber as sides. Thinly cut.
- Green onion as sides. Julienne cut.
Marinade
- 1 Egg
- 1 tbsp Soy sauce
- 1 tbsp Shaoxing wine (or dry sherry)
- 1 tsp Brown sugar
- 1/2 tsp Five spices
- 1 tsp Sesame oil
Coating
- 3 tbsp All-purpose flour
- 3 tbsp Corn starch
- 1 tsp Baking powder
- Salt & Pepper to taste
Glaze
- 3 tbsp Hoisin sauce
- 1 tbsp Soy sauce
- 1 tbsp Honey or brown sugar
- 1 tbsp Rice vinegar
- 2 tbsp Water
Instructions
Marinating
- In a medium-size bowl, mix in egg, soy sauce, shaoxing wine, five spices, brown sugar, and sesame oil. Whisk until well-combined.
- Add in the chicken pieces into the mixture, give it a good massage until it's all well-coated. Set aside and let it rest for at least 30 minutes. The longer you marinate it, the better it tastes.
Coating
- Heat up the oil for deep frying.
- In the meantime, in a ziplock bag, add in the flour, corn starch, baking soda, salt and pepper. Mixed everything until well-combined. I used ziplock bag to coat my chicken so it saves me some dishes 😀
- Add in the marinated chicken pieces into the flour mixture, zip the ziplock bag and shake the chicken and the flour, and gently massage as you go until all the chicken pieces well-coated.
- Deep fry into the pre-heated oil until light golden brown. Transfer the fried chicken on the paper towel to drain the excess oil. For longer crispiness, you can double fry your chicken or toss them in the over for a couple of minutes like I did. Trust me, it stays crispy longer even after coating them with the glaze.
- Prepare your steamer and place the bao buns in it, leaving a little space between them so they don’t stick together. Cover and steam for about 8–10 minutes until the buns are soft and heated through. Let the buns stay in the steamer until you are ready to assemble them.
Glazing
- In a medium skillet, add in hoisin sauce, soy sauce, honey/sugar, rice vinegar, and water. Stir until well-combined and let it simmer for about 1-2 minutes. Let it cool before coating the crispy chicken.
- Once the glaze slightly cools, add in the crispy chicken in the glaze and coat it evenly. Do not soak the crispy chicken.
Assembling
- Take the hot buns, and fill in with cucumber slices, julienne green onion, and the glazed crispy chicken. Serve while they are still warm. Enjoy! 🙂
Leave a Reply